Congratulations on taking the first step towards creating your dream website! Let’s outline the steps to setup and edit your Template to create your customised branded website. You’ve just made life a whole lot easier for yourself. This is going to be a breeze to edit, launch and update!
So let’s get started with the basic steps and once you work through them you are ready to launch.
- Set up your website branding
- Input your website copy
- Upload your images, gifs and videos
- Customize your website design Step
- SEO Optimisation
- Double-check and test everything
- Setup Your Domain Step
- Launch & Market
When it comes to customising and making changes to the design layout, we would recommend that you try to stay as close to the original design as possible. That’s why you opted for a template, after all. To save you time and to utilise the strategic design that’s already been optimised for you.
Depending on the amount of copy you have, this may affect the spacing a bit which you can easily adjust to fit. That’s why it’s important to add your content and copy first and then adjust and customise.
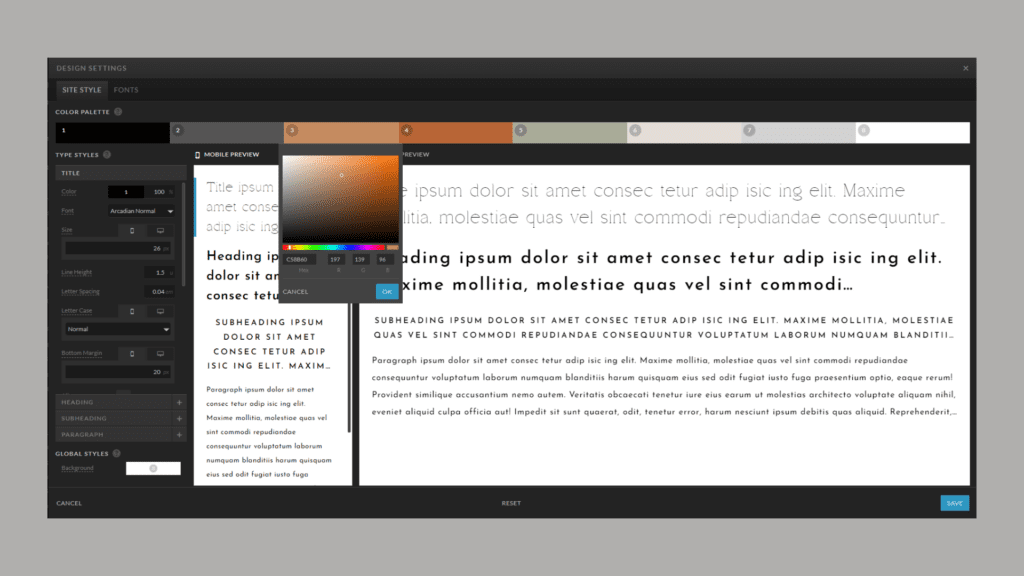
1: Set up your website branding
Here is everything you need for your branding:
- PNG files of your logo
- Hex codes for your colour palette
- Design elements and icons
- Favicon
- All brand font styles
The first step is to update your design settings so you can update your fonts and colours automatically across your entire website easily.
Here is how to add your colours and fonts. If you want to add custom fonts, you can view how to do that here.
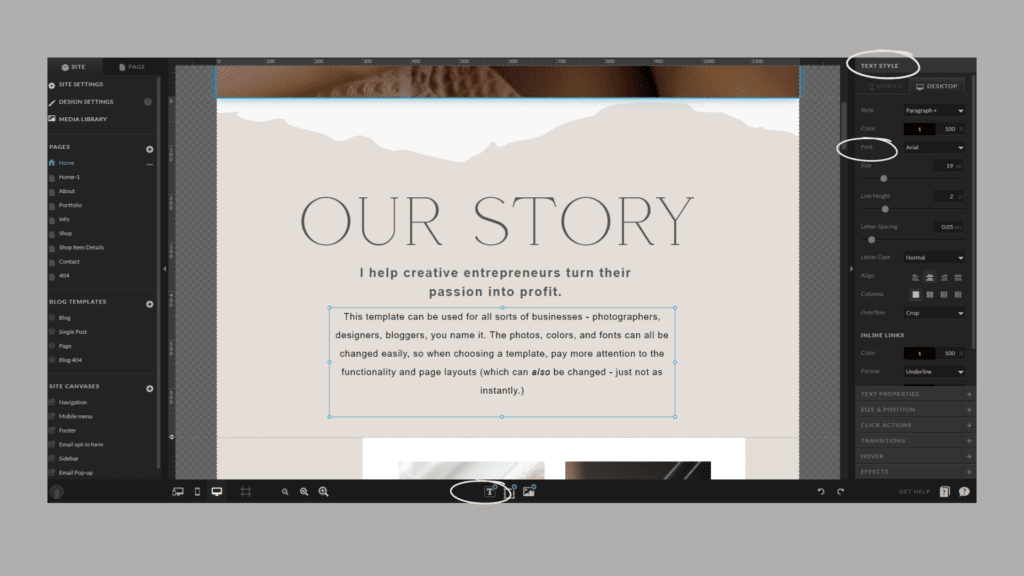
2: Input your website copy
Every website needs a compelling copy that not only grabs your readers’ attention but also motivates them to transition from passive visitors to engaged clients or customers.
The easiest way to write and input your copy is to write it out in a Google doc following the outline and flow of your Alow Creative template. Utilise the headings and sections as a guide. You can even list them out in your document and write out each section to match the length on the template. Follow the sections as a guide, and remember to keep things concise and easy to digest (less is often more unless you are crafting a captivating story).
You want to make sure your most important points stand out in the largest text elements on each page, and always keep in mind the message you want your audience to take away from their experience. The essentials to cover on your website are:
- What you do
- What you offer
- How it benefits or transforms your ideal clients
- Why you stand out from the competition
- Why they should choose you
- What their clear next step is
Let your ideal client know you understand them and their struggles. You know how they feel and what they want and need. You have the solution for them!
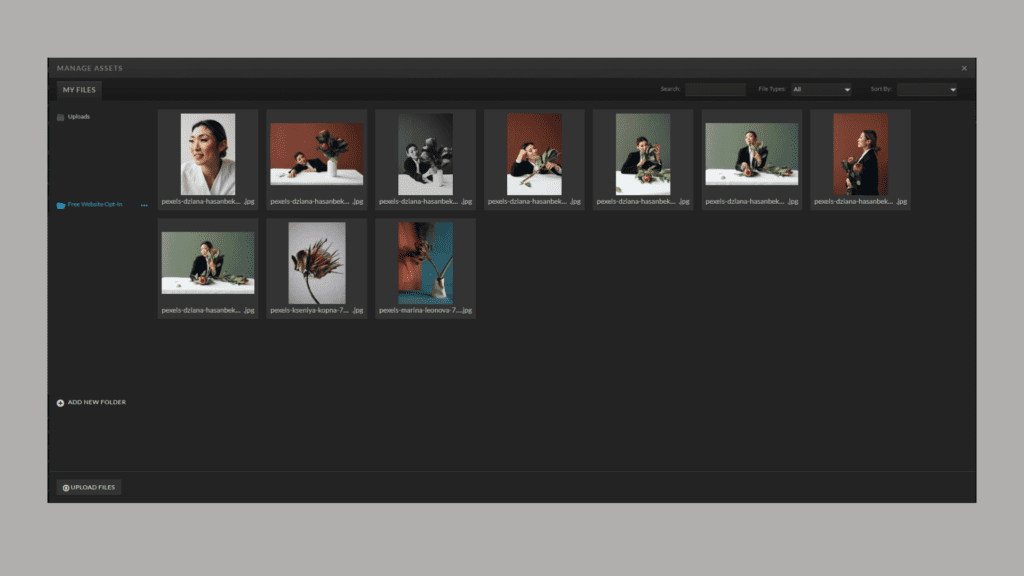
3: Upload your images, gifs and videos
The great thing about your template is you can use the stock images provided or replace them with your personal brand photos or images. The best way to add all of your visual assets is to collate your photos, stock images, gifs, videos and logos in one place e.g.(DropBox or Google Drive).
You can then easily upload them into your media library on Showit. You can see how to do that here. Showit will also resize your images to fit the area and screen dimensions for you. All you have to do is optimise your images. To avoid slow upload on your website it is best practice to make sure that your images are at least 1500px and no larger than 3500px. This will ensure there are no page load speed issues.
There are many tools to use for this like image optimizer or tinyjpg.com. You can compress your images in batches and upload them to your media library easily. We recommend adding SEO titles and descriptions when you add your images to your library in Showit. You can see how to upload images to your media library here.
Once they are all in your library, you can start adding them to the various pages of your website by clicking on the image from the template you’d like to replace, selecting “Image” from the settings bar in the top right hand corner, and clicking “swap image.” You can view how here.
(Or, if you’re replacing a canvas background, select “canvas background” and then click on the image—or video—to replace it.)
4: Customize your website design
This is when your creation comes to life! All of your branding is in – your colours, images, copy and fonts. This is definitely our favourite part. If you need to make any adjustments or add in any links or extras the Showit support team are available 24/7 to jump into your site and assist. Their level of customer support and expertise is beyond helpful. We would highly recommend also doing a quick search in their support documents for step-by-step instructions on anything you may need.
You can also reach out to us at hello@alowcreative.com of course.
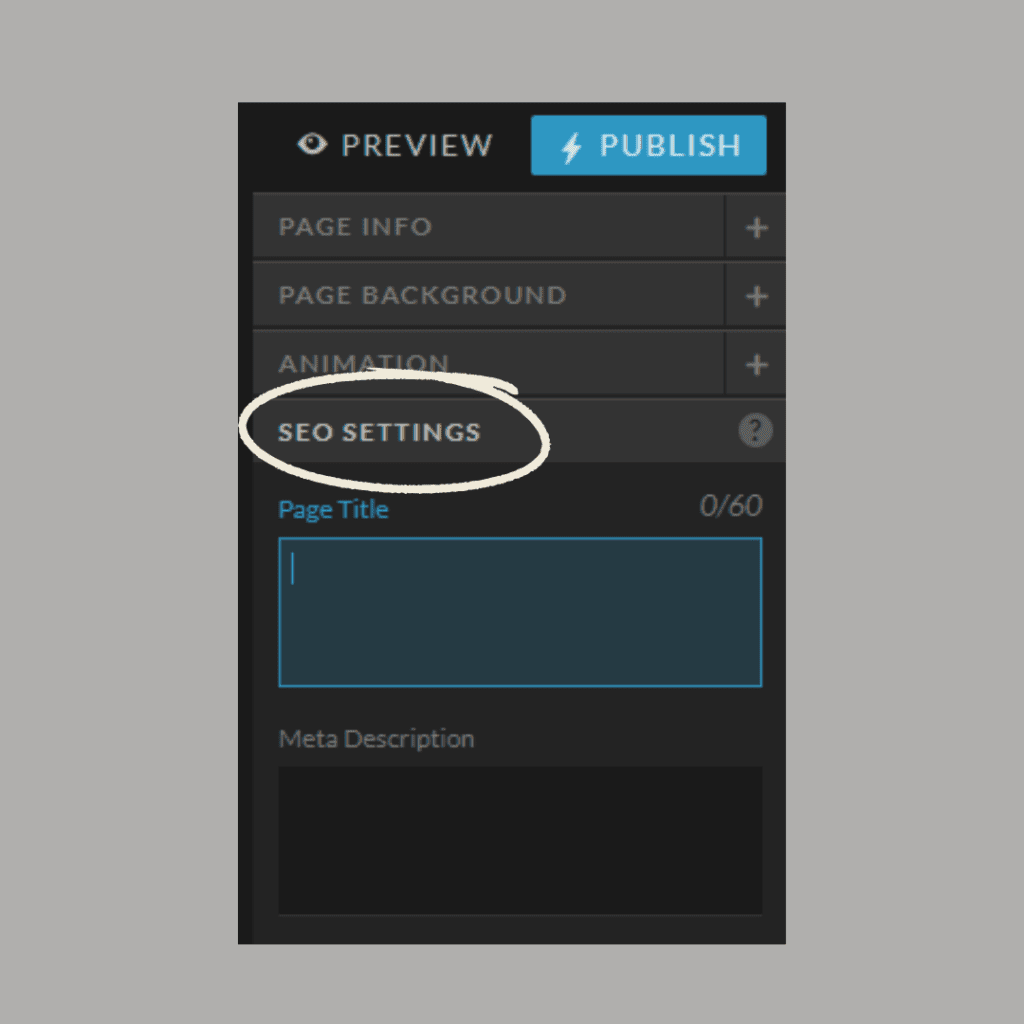
5: SEO Optimisation
This is where a lot of people get overwhelmed but Showit have made it as simple as possible to implement SEO for your site. This will ensure people can actually find your website online through search engine optimization. You can find everything you need to know here: Showit’s Tools and SEO settings to improve website indexing and visibility.
6: Double-check and test everything
This is a crucial step to ensure your website comes across as premium, credible and professional. Broken links, spelling errors and out of place design can ruin your best and first impression. That’s why it is essential to check everything for the best possible user experience. You can use your website preview link to check these potential issues. Don’t forget to check mobile view and desktop. This step is a must-do before you publish your website.
Check your copy
Template filler text (lorem ipsums)
- Spelling mistakes
- Grammatical Errors
- Call-to-action buttons are descriptive
Check Your Links
- Do all links direct to the correct page
- Is everything that’s supposed to be a link – set up as a link
- Your navigation pages are all working
- Your buttons are active
- Your social icons are set up and linked to your social platforms
- Your footer links work You can set up images, buttons and words as links
You can learn how easy it is here – how to navigate Click Actions
Check your Mobile Version
It is also important to check that your mobile version is exactly how you want it. Remember you have to do your desktop and mobile design separately. Your mobile version will look different due to the layout on mobile devices. This is a great summary to show you how to make mobile vs. desktop changes.
Check your Canvas Views
It is important to go through your site and check that the canvas views have all been adjusted to fit your copy correctly. You can always increase the size to fit and adjust to as much space as you need for your text. You can see exactly how to use canvas views here.
Social Media Links
Make sure that all of your social icons send your users to the correct place. You can see how to set up social media links here.
If you can get a second set of eyes to read over and try out all the links on your preview site that is ideal. It’s easy to miss things when you’ve been staring at them for a while. You will be amazed at what others will spot that you were sure you had fixed.
7: Add your domain
Now you can set up your domain so you can publish and launch your site. You can find detailed instruction on how to connect your domain here. The Showit support team are also able to assist you with this. If you have a blog they will also set up or migrate your content for your blog for you. You can request assistance here.
8: Launch your website
Now it is time to get your dream website out into the world. It’s super easy and here’s how to do it. Here are Here are several marketing strategies you can implement to boost those views:
- Engage your audience through Instagram stories featuring countdowns.
- Send an email to your subscriber list, giving them a sneak peek behind the scenes of your website launch to pique their interest.
- Create a compelling before-and-after reel showcasing the transformation from your old site to the new one.
- Publish a fresh blog post and guide readers to both read the post and explore your new site.
- Introduce an exclusive freebie accessible solely through your new site, a seamless task with Showit’s user-friendly platform.
How to setup & edit your Showit Template to create your branded website.
